Hey folks, thanks for stopping by the blog! I’m the owner of a small but solid Ingersoll Rand air compressor supply business, and over the past 7 years, I’ve gotten a ton of calls that go something like this: “My IR compressor’s blowing too much or not enough air—can you walk me through fixing it?” Sure, hiring a tech works, but most of the time, adjusting the pressure is totally doable by you, no fancy tools needed. Let’s break this down step by step, no jargon, just real stuff I’ve tested on hundreds of IR models (from their classic reciprocating jobbies to their rotary screw units that auto-adjust mid-shift). Ingersoll Rand Air Compressor
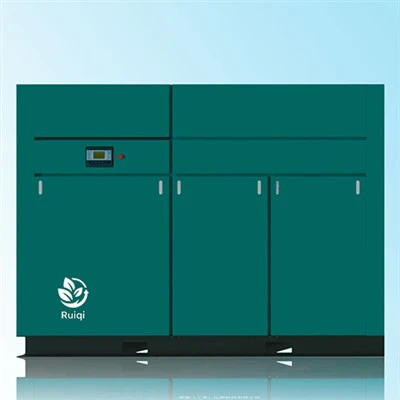
First, let’s get one thing straight: adjusting air pressure isn’t just twisting a random knob and crossing your fingers. If you mess it up, you could overwork your compressor, waste energy, or even mess up your tools. This guide works for nearly all Ingersoll Rand units—whether it’s a 5-gallon portable for your garage or a 50HP workhorse powering a whole production line. I’ll cover the basics first, then dive into the different types because IR makes so many models, you can’t treat every one the same.
Before you touch anything, safety first. I say this every time someone rushes in—shut the compressor OFF and unplug it. Then, drain all the built-up air from the tank by opening the drain valve at the bottom. Air under pressure is no joke; even a small burst can knock a tool or a part loose. Wait 10 minutes after draining to let all the parts cool down too—you don’t want to burn your hand on a hot knob. Got that? Good. Let’s start with the most common IR units people ask about: the reciprocating piston type, like their iconic SS-series or portable job compressors.
For reciprocating IR compressors, the pressure is controlled by a pressure switch—this is the little box usually mounted on the side of the compressor tank, with wires running to it, and a couple of adjustment knobs on top. Most models have two settings: cut-out pressure (that’s the max pressure the compressor will hit before it turns off) and cut-in pressure (the min pressure it drops to before turning back on to refill the tank). Let’s say you need 100 PSI, for example, set cut-out to 110 PSI, and cut-in to 90 PSI— that 20 PSI gap keeps the compressor from cycling on and off every 2 seconds, which wears it out fast. To adjust the main cut-out pressure, you use the larger of the two knobs on the pressure switch. Turn it clockwise to raise the pressure, counterclockwise to lower it—small twists only! A quarter turn moves PSI by like 5, so don’t crank it a full turn or you’ll over or under shoot. The smaller knob adjusts the cut-in pressure, usually set 20 PSI below cut-out; mess with that only if you need a different cycle gap, like 15 PSI for tools that need super consistent pressure.
Wait, hold up—what if you have an Ingersoll Rand rotary screw compressor, the big ones used in factories, auto shops, or construction sites? Those are a little different because they run continuously, so their pressure is controlled by an onboard controller, not a manual pressure switch. If you’ve got a unit like the IR Next Generation R-Series or the older UP-Series, the process is dead simple once you figure out the controller interface. Most newer models have a digital screen—you just press the “Menu” button, scroll to “Pressure Settings,” enter your service code (I can send you that if you need it, no extra charge), and use the up/down arrows to set your desired pressure. Old models with analog dials, on the other hand, have a pressure regulating valve mounted on the compressor’s air outlet line, not the tank. That knob—usually with a locking collar around it to keep it from getting bumped—turns clockwise to raise pressure, counter to lower. Pro tip for rotary screw units: don’t set your pressure higher than your tools or equipment require. If your sandblaster only needs 90 PSI, setting it to 120 is just wasting electricity, and I’ve seen hundreds of clients overpaying their power bills by doing that.
Now, let’s talk about the most common mistakes I see people make when adjusting their IR compressor. First, cranking the pressure knob all the way to max. I get it—you think more pressure means more power, but it actually stresses the compressor’s pump, motor, and tank way more than they’re designed for. Over time, that leads to leaks, blown seals, or even a tank failure, which is super dangerous. Second, not checking the actual pressure with a separate gauge. Wait, what? Almost every compressor has a built-in pressure gauge, but I swear 1 out of 3 of those are off by 10-15 PSI, especially on older units. Grab a good quality tire gauge or a digital pressure gauge, hook it up to the air outlet (not the tank valve) after adjusting, and double-check. If the numbers don’t match, your built-in gauge is just bad, and you should replace it anyway. Third, forgetting to lock the adjustment once you’re done. That locking collar I mentioned for rotary screw units? Don’t skip that. If someone bumps the knob while you’re working, you’ll end up with no pressure or way too much, and that’s how tools get damaged.
What if your compressor won’t hold pressure at all after adjusting? That’s not usually an adjustment issue, that’s a seal or valve problem. But if you just messed with the pressure switch and now it won’t turn on, first check that the wires on the switch are tight—loose wires are super common. If it still won’t cycle, maybe you set the cut-in pressure too low, so the switch can’t sense it. Give me a call if that happens, I’ve got a basic checklist I walk people through for free.
Now, let’s wrap this up with a quick recap to make sure you don’t forget anything. First, safety: shut off, unplug, drain air, cool down. Second, identify your IR compressor type: reciprocating (pressure switch on tank) or rotary screw (digital controller or outlet valve). Third, make small, gradual adjustments—quarter turns at a time, then check pressure. Fourth, always verify with a separate gauge. Fifth, lock the adjustments when you’re done to keep it from shifting.
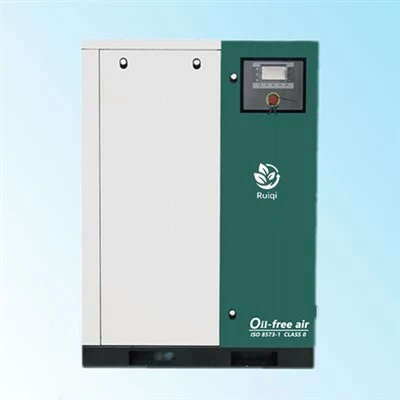
I’ve been supplying Ingersoll Rand compressors for years, and one thing I know for sure: most pressure issues aren’t big, expensive repairs—they’re just small adjustments that take 10 minutes. But if you’re not comfortable messing with the internal parts of your compressor, no shame in reaching out. That’s what my team and I are here for—we sell new IR units, parts, and do routine tune-ups, so whether you need help adjusting pressure, replacing a worn valve, or buying a brand new compressor for your shop, we’ve got you covered. Don’t overpay for unnecessary repairs or parts—just send over a note to connect, and we can walk you through whatever you need, no hard sell, no hidden fees. Catch you next time!
Ingersoll Rand Air Compressor Parts References:
- Ingersoll Rand Official Maintenance Guide for Reciprocating Air Compressors
- Ingersoll Rand Operation Manual for Rotary Screw Compressors (Series R, UP, and NIRVANA)
- OSHA Safety Guidelines for Compressor Pressure Adjustment and Handling
- Ingersoll Rand Technical Support Blog: Common Pressure Adjustment Mistakes for Industrial Air Compressors
Suzhou Ruiqi Intelligent Equipment Co., Ltd.
As one of the most professional ingersoll rand air compressor manufacturers and suppliers in China, we also support custom service. As we have world-leading production equipment and strong manufacturing capabilities, we warmly welcome you to buy high quality ingersoll rand air compressor made in China here from our factory. Contact us for pricelist.
Address: No. 1729, Zhongshan South Road, Wujiang District, Suzhou City, Jiangsu Province, China, 16th Floor
E-mail: wts476626494@126.com
WebSite: https://www.ruiqicomp.com/
