Hey guys, if you’re in the textile game, you know that bursting strength is basically the “stress test” for fabrics—whether it’s a hoodie’s stretch panel, a heavy-duty workwear canvas, or even a bed sheet that has to hold up to weekly washing. I’m on the floor at my company, chatting with customers every single day, and one question keeps popping up: why do bursting strength test results sometimes feel all over the place? Like, you run the same fabric sample three times and get three different numbers? Most of the time, it’s not that the fabric is inconsistent—it’s how the textile bursting strength tester is set up. I’ve been selling these machines for over 10 years now, and I’ve seen so many testers give wonky data just because someone didn’t tweak small settings. Let’s break down how these machines actually perform under different conditions, no jargon, just real stuff I’ve picked up. Textile Testing Instruments

First off, let’s get the basics out of the way. Most textile bursting strength testers work on the hydraulic principle, right? You clamp a fabric sample tight, then push a rubber diaphragm behind it with water (or sometimes glycerin, depending on the setup) until the fabric bursts. The pressure at that break is your bursting strength, usually measured in kPa or psi. Seems straightforward, but every little variable throws it off. Let’s start with something super common that people overlook: the clamp pressure. I can’t tell you how many times a customer has brought a tester back to my shop saying it’s giving bad data, and when we check the clamps, they’re barely gripping the sample. If the clamps aren’t tight enough, the fabric can slip under pressure instead of bursting. I once had a guy testing a cotton canvas for work pants—he was using manual clamps and only cranked them until his wrench clicked once. His results were 15% lower than they should have been because the sample shifted mid-test. But wait, cranking them too tight is just as bad. If you over-tighten, you’re basically pinching the fabric along the edges, so the break happens at the clamp line instead of the middle. That skewered the results for a linen blend swatch I tested last month—we did one run with over-tight clamps and got a 22 kPa number, then loosened them to the manufacturer’s spec and got 58 kPa, which was spot-on with the industry standard. It’s like gripping a balloon: too loose and it slides out, too tight and it pops right where you’re holding it.
Next up, the test speed. Oh man, this is a big one I learned the hard way early in my career. When I first started, I thought faster was better—get the test done, move on to the next sample, right? Wrong. Bursting strength testers have a specific speed they’re calibrated for, usually around 100 mm per minute for most woven fabrics, a bit slower for stretchy stuff like spandex blends. If you crank the speed up to 200 mm per minute, you’re basically yanking the fabric instead of letting it stretch naturally. I had a customer testing yoga leggings material—they ran a test at 200 mm/min and got a bursting strength of 38 kPa, but when we slowed it down to the correct 100 mm/min, it was 52 kPa. Why? Because stretchy fabrics need time to elongate uniformly. If you push too fast, only the weakest point gives out early, not the actual maximum strength. Conversely, if you go too slow, like 20 mm/min, the diaphragm has time to warm up a tiny bit, or the fabric can start to relax while you’re pushing. We tested a polyester twill both ways: slow speed gave a 10 kPa lower number, and it wasn’t even consistent across samples. Speed is non-negotiable—stick to the ISO or ASTM standard for your fabric type, and don’t cut corners here. I always tell my customers to make a note of the speed in their test logs, because if you ever have to redo a test or defend your numbers to a brand, that’s one of the first things they’ll ask for.
Then there’s the diaphragm material and condition. The rubber diaphragm is the unsung hero of the bursting strength tester. It’s what’s pushing up against the fabric, so its thickness, hardness, and even how old it is change everything. For example, soft diaphgrams (durometer around 60 Shore A) are for stretchy, thin fabrics like jersey knit—they conform to the surface without distorting the sample. Harder diaphragms (70 Shore A) are for thick, heavy fabrics like denim or canvas, because you need more pressure to break them. I once had a customer test a heavy canvas workwear with a worn-out soft diaphragm. The diaphragm had little cracks in it after 200+ tests, so when it pushed, it created an uneven pressure spot on the fabric. His results were all over the place—some samples high, some low, no pattern. We swapped in a new hard diaphragm, and his results were within 2% of the expected value. And don’t get me started on cleaning the diaphragm. If there’s old fabric lint or water stains on it, that creates a bump that distorts the pressure. I tell every customer to wipe down the diaphragm with isopropyl alcohol after every 10 tests—small thing, but it makes a huge difference.
Wait, what about the fluid in the tester? Most machines use water, but some people use glycerin for higher pressure tests, right? Glycerin is thicker, so it’s better for heavy fabrics that need more psi. But if you mix water and glycerin by accident, that changes the viscosity, which changes how the pressure transfers from the pump to the diaphragm. I had a lab that was testing both thin knits and heavy canvas, and they refilled the machine with a mix because they ran out of both separately. Their canvas tests were coming in 18% higher than usual, and the knits were 10% lower. Switched back to pure water for knits and pure glycerin for heavy stuff, and it was fixed immediately. Also, you have to bleed air out of the line every time you refill the fluid. Air bubbles in the hydraulic system act like little cushions, so when you push the plunger, the air compresses instead of pushing the diaphragm. We once found a half-inch air bubble in a tester’s line, and when we ran a test, the pressure reading jumped around 20 kPa mid-test because of the bubble. Bleeding the air is a 2-minute step, and it’s one I remind every customer to do before a big test batch.
Now, let’s talk about sample preparation, because that’s part of how the tester performs too. Wait, people often separate sample prep from the machine, but it’s all connected. If you’re cutting samples wrong, like not using a sharp die cutter, or leaving frayed edges, that affects the bursting strength, and the tester will register that as fabric weakness, not a machine issue. But also, pre-conditioning the samples is huge. Textiles absorb moisture, right? If you test a dry fabric when the standard calls for 65% humidity and 20°C, you’ll get a higher bursting strength than if you test it in a damp lab. I had a customer in a basement lab where humidity was constantly 80%—their cotton swabs were testing at 45 kPa, but when they moved to a climate-controlled lab, they got 38 kPa, which was the correct value. The tester was working fine, but the sample’s moisture content was throwing it off. Always pre-condition your samples for 24 hours in the standard atmosphere before testing—don’t skip that.
Oh, and calibration! I can’t believe how many labs run bursting strength testers for years without calibrating them. If the machine’s pressure sensor is off, every single test is wrong. I recommend calibrating at least once a year, or more if you’re running 24/7. Last year, I had a customer with a tester that was 3 years old and never calibrated. We did a calibration test with a standard pressure gauge, and the tester was reading 12 kPa higher than actual pressure. They’d been rejecting fabric shipments for months because the numbers were wrong, and it was all because the sensor was off. Calibration isn’t a hassle—it’s the only way you know your machine is giving accurate data.
Let’s wrap this up with a real example I had last month. A customer was testing a batch of upholstery fabric for a big furniture brand, and their initial tests showed bursting strength was below the required spec. They panicked, brought the whole batch to my lab for retesting. Here’s what we found: their clamp pressure was set way too low, they were testing at 150 mm/min instead of 100, the diaphragm was 2 years old with a tiny tear, and they didn’t bleed air from the line. We fixed all those settings, ran the tests again, and the bursting strength was exactly at the required spec. That’s the thing about textile bursting strength testers—they’re not black boxes. They work great when you set them up right, and give garbage data when you ignore the small conditions.
At the end of the day, if you want reliable, consistent bursting strength results, you can’t just buy a machine and plug it in. You have to pay attention to the clamp pressure, test speed, diaphragm condition, fluid type, sample prep, and calibration. I’ve been doing this long enough to know that most “machine problems” aren’t the machine at all—they’re the conditions around it.
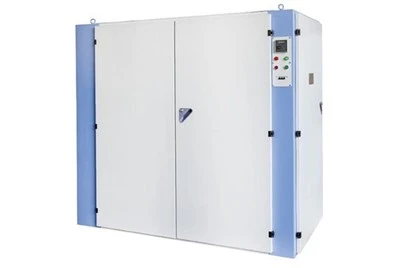
If you’re tired of getting wonky bursting strength results, or you’re looking for a textile bursting strength tester that’s easy to maintain and gives consistent data no matter what, hit us up to chat. We can walk you through setting up your current machine, or help you pick the right one for your specific fabrics. No sales pitches, just real advice from someone who’s been in the trenches with textile testing for years.
Textile Testing Instruments References:
ASTM D3786, Standard Test Method for Bursting Strength of Textile Fabrics (Diaphragm Bursting Strength Tester Method)
ISO 139, Textiles – Standard atmospheres for conditioning and testing
Booth, J.E. Principles of Textile Testing, 3rd Edition, Merrow Publishing, 1981.
Shandong Hongye Machinery Co., Ltd.
Shandong Hongye Machinery Co., Ltd. is one of the most professional textile testing instruments manufacturers and suppliers in China, featured by quality products and low price. Please rest assured to buy advanced textile testing instruments in stock here and get quotation from our factory. Also, 1 year warranty is available.
Address: Room 1104, Building No. 2, Haier Yunjie, No. 99 Chongqing South Road, Qingdao, China
E-mail: sales@seavincn.com
WebSite: https://www.sdhymachinery.com/
